If you own a Roborock vacuum robot and are facing lidar sensor issues, you’re not alone. In fact, did you know that over 50% of Roborock vacuum robot owners experience some form of lidar-related problem during the lifespan of their device?
But don’t worry! This comprehensive lidar repair guide will equip you with the knowledge and step-by-step instructions needed to fix your robot and restore its optimal functionality. Whether you’re dealing with common lidar-related error codes, need to diagnose lidar malfunctions, or simply want to learn more about the role of lidar in Roborock functionality, this guide has got you covered.
By following the tips and techniques outlined in this guide, you’ll be able to troubleshoot, repair, and maintain your Roborock vacuum robot with ease. Let’s get started!
Key Takeaways:
- Over 50% of Roborock vacuum robot owners experience lidar-related issues.
- This comprehensive guide provides step-by-step instructions to fix lidar sensor problems.
- Learn how to diagnose lidar malfunctions and understand common error codes.
- Discover the role of lidar in the overall functionality of your Roborock vacuum robot.
- Follow preventative maintenance practices to ensure optimal lidar performance.
Understanding Lidar Issues on Roborock Vacuum Robots
To effectively repair the lidar sensor on your Roborock vacuum robot, it’s important to first understand the potential issues that can arise. This section will cover common lidar-related error codes that you may encounter and how to interpret them. Additionally, you’ll learn how to diagnose lidar malfunctions, including sensor blockages or motor failures. Finally, you’ll gain insight into the role that lidar plays in the overall functionality of your Roborock vacuum robot.
Preventative Lidar Maintenance Guide for Roborock Vacuum Robots
To ensure the longevity and performance of your Roborock vacuum robot’s lidar sensor, it’s essential to follow a preventative maintenance routine. In this section, you’ll learn about the best practices for cleaning the lidar sensor, including removing any dust or debris that may hinder its functionality. Additionally, you’ll discover the importance of regular firmware updates to keep your robot running smoothly. Finally, you’ll gain essential tips for proper handling and use of your Roborock vacuum robot to minimize the risk of lidar issues.
Routine Cleaning Practices
Regularly cleaning the lidar sensor of your Roborock vacuum robot is crucial to maintain its optimal performance. Dust, dirt, and debris can accumulate on the sensor, impacting its ability to accurately navigate your home. Follow these routine cleaning practices to ensure the cleanliness of your lidar sensor:
- Turn off your Roborock vacuum robot and remove the dustbin.
- Locate the lidar sensor, usually located on the top of the robot.
- Gently use a microfiber cloth or a soft brush to wipe away any dust or debris from the sensor.
- Check for any obstructions or blockages around the sensor and remove them carefully.
- Once the sensor is clean, reattach the dustbin and turn on your Roborock vacuum robot.
By incorporating routine cleaning practices into your maintenance routine, you can ensure that the lidar sensor of your Roborock vacuum robot remains free from dirt and debris, allowing it to function optimally.
Regular Firmware Updates
Regular firmware updates are essential for the overall performance and functionality of your Roborock vacuum robot. These updates often include improvements and bug fixes that can enhance the lidar sensor’s performance. Follow these steps to ensure your robot is always running the latest firmware:
- Connect your Roborock vacuum robot to your home’s Wi-Fi network.
- Open the Roborock mobile app on your smartphone or use the robot’s interface to access settings.
- Check for any available firmware updates and follow the prompts to download and install them.
- Once the firmware update is complete, restart your robot to apply the changes.
Regularly updating the firmware of your Roborock vacuum robot ensures that it remains equipped with the latest features and enhancements, providing a smoother lidar sensor experience.
Proper Roborock Handling and Use
Proper handling and use of your Roborock vacuum robot can contribute to the longevity and performance of its lidar sensor. Follow these tips to minimize the risk of lidar issues:
- Avoid dropping or jarring your Roborock vacuum robot, as it can damage the lidar sensor or other internal components.
- Regularly inspect the brushes, wheels, and other parts of your robot for any signs of wear and tear, as they can affect the lidar sensor’s functionality.
- Ensure proper charging and storage conditions for your robot to prevent any damage to the lidar sensor during charging or when not in use.
- Follow the user manual instructions for any specific guidelines or restrictions related to operating your Roborock vacuum robot.
By handling and using your Roborock vacuum robot with care, you can minimize the risk of lidar issues and extend the lifespan of your robot’s lidar sensor.
Lidar Troubleshooting Guide for Roborock Vacuum Robots
If you’re experiencing lidar issues on your Roborock vacuum robot, this troubleshooting guide will help you identify and resolve common problems. From connectivity issues to inaccurate mapping, this guide will provide you with step-by-step instructions for troubleshooting and resolving lidar-related problems on your Roborock vacuum robot.
When troubleshooting your Roborock vacuum robot’s lidar, it’s essential to follow a systematic approach. Start by checking the connectivity of the lidar sensor to ensure it is properly connected. If there are any loose or disconnected cables, reconnect them securely. Additionally, check for any visible damage to the sensor or obstruction in its path.
If connectivity is not the issue, the next step is to address mapping inaccuracies. One common cause of inaccurate mapping is a dirty lidar sensor. Dust, hair, or debris can interfere with the sensor’s ability to accurately detect and map the environment. Use a soft, clean cloth to gently wipe the sensor and remove any buildup.

If cleaning the sensor does not resolve the issue, it may be necessary to recalibrate the lidar sensor. Refer to your Roborock vacuum robot’s user manual for specific instructions on how to perform a sensor recalibration.
In case the lidar issues persist and cannot be resolved through troubleshooting and calibration, it’s advisable to contact Roborock customer support for further assistance. Their expert technicians will be able to provide guidance and advice on how to resolve the problem or arrange for repairs if necessary.
Remember, lidar troubleshooting requires patience and careful attention to detail. By following the steps outlined in this guide, you’ll be able to diagnose and resolve lidar issues on your Roborock vacuum robot, ensuring optimal performance and efficient cleaning.
Comprehensive Lidar Repair Guide for Roborock Vacuum Robots
Tools and Materials Needed
To replace the lidar sensor on your Roborock vacuum robot, you will need the following tools and materials:
- Screwdriver set
- Replacement lidar sensor
- Adhesive
- Cleaning cloth
- Anti-static wrist strap
Ensure you have these items ready before proceeding with the lidar sensor replacement.
Step-by-Step Lidar Sensor Replacement
Follow these step-by-step instructions to successfully replace the lidar sensor on your Roborock vacuum robot:
- Step 1: Turn off and unplug the robot
Start by turning off your Roborock vacuum robot and unplugging it from the power source. This will ensure your safety during the repair process. - Step 2: Access the lidar sensor
Locate the lidar sensor on your Roborock vacuum robot. It is typically located on the top of the robot, underneath a protective cover. Remove any screws or clips securing the cover and carefully lift it off to access the lidar sensor. - Step 3: Disconnect the old lidar sensor
Once you have accessed the lidar sensor, disconnect any cables or connectors attached to it. Take note of the connections so that you can properly reconnect them later. - Step 4: Remove the old lidar sensor
Carefully remove the old lidar sensor from its mounting position. Take note of any adhesive that may be securing the sensor in place, and remove it gently to avoid damaging any components. - Step 5: Install the new lidar sensor
Take the new lidar sensor and position it in the mounting area. Ensure it is aligned properly and fits securely. If necessary, use adhesive to secure the sensor in place. - Step 6: Reconnect the cables
Carefully reconnect the cables or connectors to the new lidar sensor, ensuring they are securely attached. Take your time to match the connections correctly to avoid any issues with functionality. - Step 7: Replace the protective cover
Place the protective cover back over the lidar sensor and secure it with the screws or clips. Ensure it is firmly in place to protect the sensor from any potential damage. - Step 8: Test the lidar sensor
After replacing the lidar sensor, plug in your Roborock vacuum robot and turn it on. Test the functionality of the new sensor by running the robot and observing its navigation capabilities. If the sensor is working correctly, you have successfully replaced the lidar sensor.
By following these steps, you’ll be able to replace the lidar sensor on your Roborock vacuum robot and restore its optimal functionality.
How to Fix Lidar on Roborock Vacuum Robots with Error 1
If you’re encountering Error 1 on your Roborock vacuum robot, it’s important to understand the steps to identify and fix the issue. In this section, we’ll guide you through the process of identifying Error 1, troubleshooting and resolving sensor blockages that may cause it, and replacing the lidar motor if necessary. By following the detailed instructions and illustrations provided, you’ll be able to fix lidar issues and restore your Roborock vacuum robot to its optimal performance.
Identifying Error Code 1
Error Code 1 indicates a lidar issue on your Roborock vacuum robot. The lidar sensor is responsible for mapping and navigation, so it’s essential to address this error promptly. To identify Error Code 1, follow these steps:
- Observe any error messages or indicators displayed on your Roborock vacuum robot.
- Refer to the user manual or online resources specific to your model to identify the corresponding error code.
Resolving Error 1 Caused by Sensor Blockage
Sensor blockages are a common cause of Error 1 on Roborock vacuum robots. To resolve this issue, follow these steps:
- Turn off and unplug your Roborock vacuum robot.
- Inspect the lidar sensor for any physical obstructions, such as dust or debris.
- Carefully remove any obstructions using a soft, dry cloth or compressed air.
- Once the sensor is clean, plug in and power on your robot, and check if Error 1 persists.
Replacing the Lidar Motor
If troubleshooting the sensor blockage doesn’t resolve Error 1, it may be necessary to replace the lidar motor. Follow these steps to replace the lidar motor:
- Consult your user manual or online resources to purchase the appropriate replacement lidar motor for your specific Roborock vacuum robot model.
- Turn off and unplug your robot before proceeding with the motor replacement.
- Remove the screws or fasteners securing the lidar motor in place, using the appropriate tools.
- Disconnect the wiring harness and carefully remove the old lidar motor.
- Install the replacement lidar motor, ensuring that it is securely connected and aligned with the robot’s system.
- Tighten the screws or fasteners to firmly secure the lidar motor in place.
- Plug in and power on your Roborock vacuum robot to check if Error 1 is resolved.
By following these steps, you’ll be able to identify Error Code 1, troubleshoot and resolve sensor blockages, and replace the lidar motor if necessary. With these techniques, you can effectively fix lidar issues on your Roborock vacuum robot and ensure its optimal performance.
DIY Lidar Repair for Roborock Vacuum Robots
Detailed Disassembly Instructions
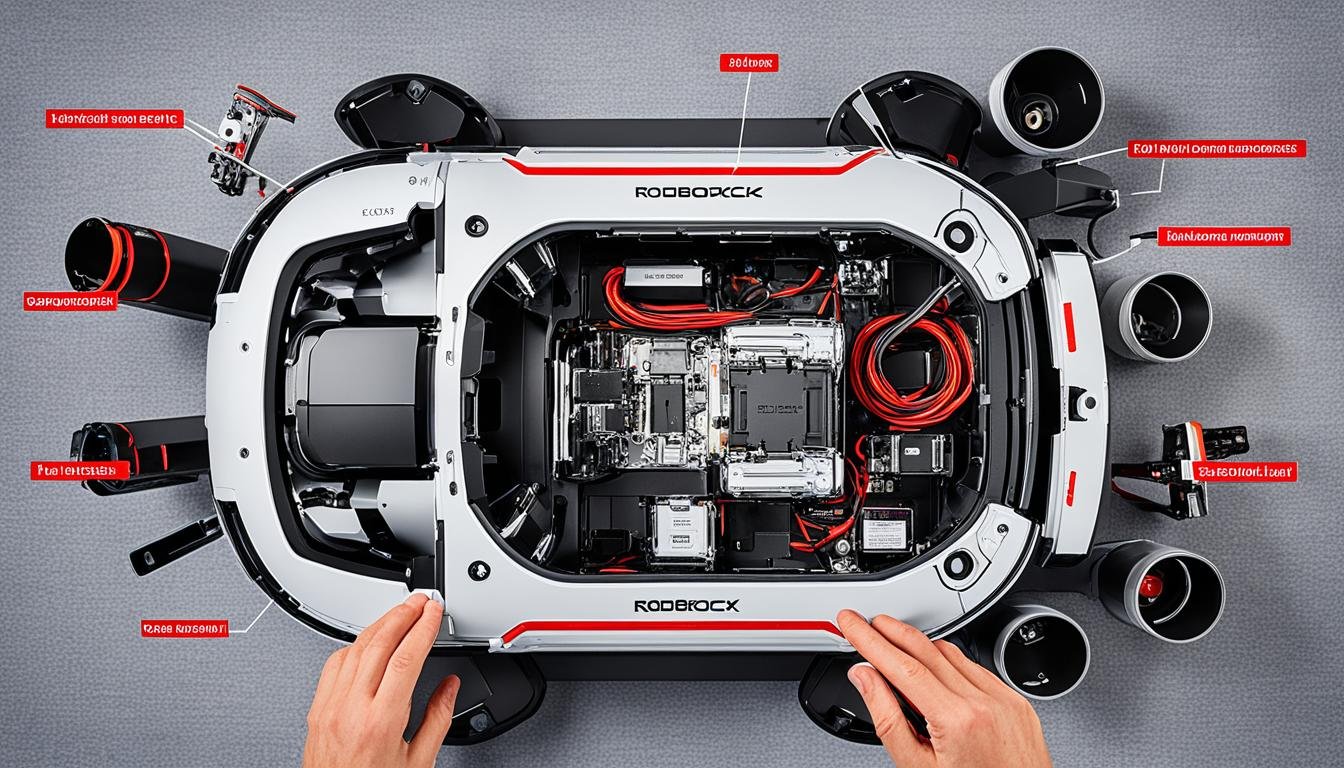
For those who prefer a hands-on approach, this section provides detailed instructions for DIY lidar repair on your Roborock vacuum robot. By following these step-by-step disassembly instructions, you’ll be able to access the lidar sensor and perform the necessary repairs.
Note: Before you begin the repair process, make sure to disconnect your Roborock vacuum robot from any power source to ensure your safety.
1. Start by placing your Roborock vacuum robot on a clear, flat surface.
2. Carefully remove the screws securing the outer shell of the robot using a screwdriver. It’s crucial to keep track of the screws and their respective locations to ensure proper reassembly later.
3. Once all the screws are removed, gently lift the outer shell, revealing the internal components of the robot.
4. Locate the lidar sensor, which is typically positioned on the top or front of the robot, depending on the model. It may be connected to the main circuit board through a cable.
5. Carefully disconnect the cable connecting the lidar sensor to the main circuit board. Ensure that you do not force or damage the cable during this step.
6. Once the lidar sensor is disconnected, remove any securing screws or clips holding it in place.
7. Carefully remove the lidar sensor from its position, taking note of its orientation and any additional cables or connectors.
8. Inspect the lidar sensor for any visible damage, such as broken parts or loose connections. If necessary, refer to the appropriate repair guide or consult with a professional for further assistance.
9. If you have a replacement lidar sensor, carefully install it in the same orientation and secure it with the screws or clips previously removed.
10. Reconnect the cable between the lidar sensor and the main circuit board, ensuring a secure connection without any force.
Navigating the Internal Components
With the lidar sensor removed, it’s essential to navigate the other internal components of your Roborock vacuum robot carefully. This will allow you to ensure that everything is in proper working order and make any additional repairs if required.
1. Inspect the main circuit board for any signs of damage, such as burnt components or loose connections. If any issues are identified, consult the appropriate repair guide or seek professional assistance.
2. Check the cables and connectors for secure connections and any signs of wear or damage. Replace any damaged cables or connectors as necessary.
3. Clean the internal components, including the main circuit board and surrounding areas, using compressed air or a soft brush to remove any dust or debris that may affect performance.
4. Ensure that all components are in their proper positions and securely fastened before proceeding with reassembly.
Reassembling Your Roborock After Repairs
Once the necessary repairs and inspections are complete, it’s time to reassemble your Roborock vacuum robot.
1. Begin by carefully placing the lidar sensor back into its original position, ensuring proper alignment and securing it with the screws or clips.
2. Reconnect the cable between the lidar sensor and the main circuit board, making sure it is securely fastened.
3. Lower the outer shell of the robot back into place, aligning it with the screw holes.
4. Insert and tighten the screws, ensuring that each screw is tightened to the appropriate level without overtightening.
5. Once all screws are in place, double-check that all components are securely fastened and properly aligned.
6. Connect your Roborock vacuum robot to a power source and power it on to confirm that the lidar sensor is functioning correctly.
With this DIY lidar repair guide, you now have the knowledge and instructions to confidently disassemble, navigate, and repair the lidar sensor on your Roborock vacuum robot. Remember to prioritize your safety and consult professional help if you encounter any challenges or doubts during the repair process.
Seeking Professional Roborock Repair Services
If you’re not confident in your ability to repair the lidar sensor on your Roborock vacuum robot, seeking professional repair services may be the best option. Professional repair services offer several benefits, including:
- Expertise: Professional repair technicians have the knowledge and experience to diagnose and fix lidar issues efficiently.
- Quality Assurance: By choosing a reputable repair service, you can ensure that your Roborock vacuum robot will be repaired using genuine parts and in accordance with manufacturer guidelines.
- Time-Saving: Professional repairs can save you time and effort, as you won’t need to spend hours troubleshooting and researching solutions.
When searching for Roborock repair services near you, consider the following:
- Reputation: Look for repair services with positive customer reviews and a track record of reliable repairs.
- Certifications: Check if the repair service is certified or authorized by Roborock, as this demonstrates their expertise and adherence to industry standards.
- Warranty: Inquire about the warranty offered by the repair service for their work. Reputable repair services often provide a warranty to give you peace of mind.
- Cost: Compare the cost of repair services in your area to ensure you’re getting fair pricing for the repairs needed.
By considering these factors and choosing a reputable repair service, you can confidently entrust the repair of your Roborock vacuum robot to professionals, ensuring a quality and long-lasting solution. Don’t hesitate to reach out to a trusted repair service for assistance with your lidar sensor repair needs.
Lidar Repair Tips for Roborock Vacuum Robots
Troubleshooting Before Dismantling
Before you start dismantling your Roborock vacuum robot for lidar repairs, it’s essential to troubleshoot the issue to explore potential solutions. Here are some tips to help you troubleshoot common lidar problems:
- Ensure that the lidar sensor is clean and free from any dust or debris. Use a soft, dry cloth to gently wipe the sensor.
- Check for any obstacles or blockages that may obstruct the lidar sensor’s scanning ability. Remove any objects that might be in its path.
- Restart your Roborock vacuum robot by turning it off and on again. Sometimes a simple reboot can resolve minor lidar issues.
- Update the firmware of your Roborock vacuum robot to the latest version. Firmware updates often include bug fixes and improvements that can address lidar-related problems.
Best Practices When Handling Electronic Parts
When it comes to repairing the lidar sensor of your Roborock vacuum robot, it’s important to follow best practices for handling electronic parts. Here are some tips to ensure a successful and safe repair process:
- Power off your Roborock vacuum robot and disconnect it from any power source before starting any repairs.
- Use proper tools to avoid damaging delicate electronic components. A set of precision screwdrivers and plastic pry tools can be helpful.
- Avoid static discharge by wearing an antistatic wrist strap or regularly grounding yourself when working with electronic parts.
- Keep track of the screws and small parts you remove during the repair. Using a magnetic mat or organizing them in labeled containers can help prevent mix-ups.
- Handle electronic parts with care and avoid excessive force or bending. Delicate components like the lidar sensor can be easily damaged.
| Troubleshooting Tips | Handling Tips |
|---|---|
| Ensure the lidar sensor is clean | Power off your Roborock vacuum robot |
| Check for obstacles or blockages | Use proper tools to avoid damage |
| Restart the robot | Avoid static discharge |
| Update firmware | Keep track of screws and parts |
| Handle electronic parts with care |
Lidar Sensor Repair for Roborock Vacuum Robots: When to Seek Help
While many lidar sensor repairs can be done at home, there may be situations where it’s best to seek professional help. Knowing when to seek assistance can ensure that your Roborock vacuum robot’s lidar sensor is repaired by experts, minimizing the risk of further complications.
If you encounter any of the following signs, it may be time to consider professional repair services:
- Complex Lidar Issues: If you’re facing complex lidar-related problems that go beyond the scope of the comprehensive lidar repair guide for Roborock vacuum robots, seeking professional help is recommended. Experts have the knowledge and experience to diagnose and fix intricate sensor malfunctions.
- Uncertainty in Diagnosis: If you’re unsure about the root cause of the lidar issues or have difficulty identifying the exact problem, professional repair services can provide accurate diagnostics. They have specialized tools and equipment to pinpoint the source of the problem effectively.
- Limited Time or Expertise: Repairing the lidar sensor can be time-consuming and require technical expertise. If you have limited time or lack the necessary skills to perform the repair, professional services can efficiently address the issue, saving you time and effort.
- Warranty Considerations: If your Roborock vacuum robot is still under warranty, attempting DIY repairs may void the warranty. Seeking professional help ensures that the repairs are conducted in compliance with the manufacturer’s guidelines, preserving the warranty coverage.

When faced with any of these scenarios, reaching out to a reputable repair service for your Roborock vacuum robot’s lidar sensor is a prudent decision. Professionals can provide the expertise, technical knowledge, and specialized tools needed to resolve complex lidar issues effectively.
Roborock Vacuum Robots Lidar Repair Manual: A Comprehensive Resource
In this section, you’ll find a comprehensive resource for repairing the lidar sensor on your Roborock vacuum robot. The repair manual includes official guidelines from Roborock, as well as expert advice on handling complex lidar-related issues. Whether you’re a DIY enthusiast or a professional repair technician, this manual will serve as a valuable reference for lidar repairs on Roborock vacuum robots.
Incorporating Official Guidelines
When repairing the lidar sensor on your Roborock vacuum robot, it’s important to follow the official guidelines provided by Roborock. These guidelines outline the recommended steps and procedures for safely and effectively repairing the lidar sensor. By incorporating these official guidelines into your repair process, you can ensure that your repairs are done correctly and minimize the risk of further damage to your robot.
Expert Advice on Complex Issues
In addition to the official guidelines, this repair manual also includes expert advice on handling complex lidar-related issues. These experts have extensive knowledge and experience in lidar repair and can provide valuable insights and techniques for troubleshooting and resolving complex problems. Whether you’re facing connectivity issues, calibration problems, or other advanced lidar malfunctions, the expert advice in this manual will guide you through the necessary steps to resolve these issues.
Conclusion
In conclusion, this comprehensive lidar repair guide provides you with all the information and resources you need to fix the lidar issues on your Roborock vacuum robot. From understanding common error codes to learning how to replace the lidar sensor, this guide has covered every aspect of lidar repair. By following the instructions and tips outlined in this guide, you’ll be able to successfully repair and maintain your Roborock vacuum robot, ensuring its optimal performance for years to come.
FAQ
What are some common lidar-related error codes on Roborock vacuum robots?
Common lidar-related error codes on Roborock vacuum robots include Error 1, Error 3, and Error 18. Error 1 is typically caused by a lidar sensor blockage, while Error 3 indicates a motor failure. Error 18 often indicates a communication error between the lidar sensor and other components of the robot.
How can I diagnose lidar malfunctions on my Roborock vacuum robot?
To diagnose lidar malfunctions, you can start by checking for any visible obstructions or blockages on the lidar sensor. If there are no visible issues, you can try cleaning the sensor to remove any dust or debris. If the issue persists, it may indicate a motor failure or a more complex problem requiring professional repair.
What role does lidar play in the overall functionality of Roborock vacuum robots?
Lidar (Light Detection and Ranging) is a key component of Roborock vacuum robots that allows them to navigate and map their surroundings. The lidar sensor emits laser beams to measure distances and create a detailed map of the environment. This information is then used by the robot to navigate, avoid obstacles, and efficiently clean the space.
What are the best practices for cleaning the lidar sensor on my Roborock vacuum robot?
To clean the lidar sensor, you can use a soft cloth or a brush to remove any dust or debris that may have accumulated on the sensor. Avoid using water or cleaning solutions, as they can damage the sensor. Regularly cleaning the lidar sensor will help ensure accurate mapping and optimal performance of your Roborock vacuum robot.
How often should I perform firmware updates on my Roborock vacuum robot?
It is recommended to regularly check for firmware updates and install them as they become available. Firmware updates often include bug fixes, performance improvements, and new features that can enhance the functionality of your Roborock vacuum robot, including the lidar sensor.
What are some troubleshooting steps I can take for lidar issues on my Roborock vacuum robot?
If you’re experiencing lidar issues, you can start by resetting your robot and ensuring that the lidar sensor is not obstructed by any objects or debris. You can also try moving the robot to a different location to see if the issue persists. If the problem continues, you can consult the troubleshooting section of the user manual or seek further assistance.
What tools and materials do I need to replace the lidar sensor on my Roborock vacuum robot?
To replace the lidar sensor on your Roborock vacuum robot, you will need a screwdriver (size may vary depending on the model), a replacement lidar sensor, and a clean, well-lit workspace. It’s important to ensure that you have the correct replacement part for your specific robot model.
How can I fix lidar issues on my Roborock vacuum robot with Error 1?
If you encounter Error 1 on your Roborock vacuum robot, you can try identifying any sensor blockages by examining the lidar sensor for any visible obstructions. If there are no visible blockages, you can try cleaning the sensor using a soft cloth or brush. If the issue persists, it may require replacing the lidar motor.
Is it possible to perform DIY lidar repair on my Roborock vacuum robot?
Yes, it is possible to perform DIY lidar repair on your Roborock vacuum robot if you have the necessary tools, technical knowledge, and confidence. However, it’s important to note that DIY repairs can void the warranty and may carry certain risks. If you’re unsure or uncomfortable with the repair process, it’s recommended to seek professional repair services.
How can I find reputable repair services near me for my Roborock vacuum robot’s lidar sensor?
To find reputable repair services near you, you can start by checking the official Roborock website or contacting their customer support for recommendations. You can also read online reviews and ask for referrals from friends or family who have used repair services for their Roborock vacuum robots.
What are some troubleshooting techniques I can try before dismantling my Roborock vacuum robot?
Before dismantling your Roborock vacuum robot for lidar repairs, you can try resetting the robot and ensuring that it has a clear path for navigation. You can also check the battery level and recharge if necessary. Sometimes, lidar issues can be resolved by simply troubleshooting common connectivity or software problems.
When should I seek professional repair services for the lidar sensor on my Roborock vacuum robot?
If you’ve attempted troubleshooting, cleaning, and basic repairs but are still experiencing lidar issues, it may be time to seek professional repair services. Signs that indicate it’s time to seek professional help include persistent error codes, motor failures, or complex lidar malfunctions that require specialized equipment or expertise.
What can I expect from the Roborock vacuum robots lidar repair manual?
The Roborock vacuum robots lidar repair manual serves as a comprehensive resource for repairing the lidar sensor on your robot. It includes official guidelines from Roborock, expert advice on handling complex issues, and step-by-step instructions for lidar repairs. Whether you’re a DIY enthusiast or a professional technician, the manual provides valuable information for successful lidar repairs.